1. Open a browser and go to https://anydesk.com/en/downloads
2. Click the Download Now button
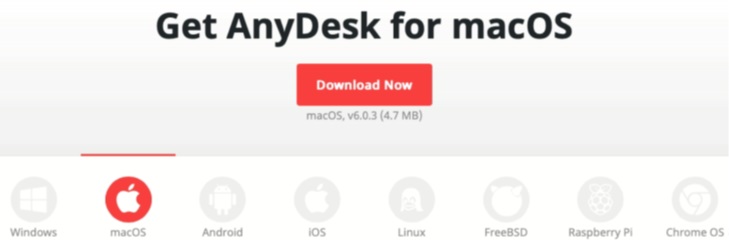
3. Make sure macOS is selected
Depending on the type of browser you are using, either Google’s Chrome browser or Safari browser, the steps will be somewhat similar.
4. If using Safari Browser, the download will start automatically. Once it has completed, you can double click the downloaded file.
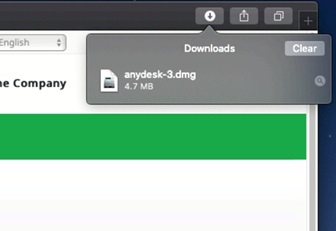
4. If using Chrome Browser, the download will start automatically and show up on the bottom left of your browser.
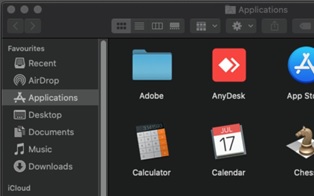
5. Drag AnyDesk to the Applications folder on the right.

6. Double click the AnyDesk icon to open the application.

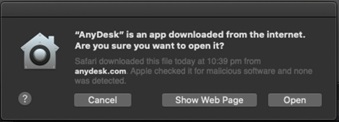
7. Depending on your security settings, you may need to authorise the application. Hit Open.
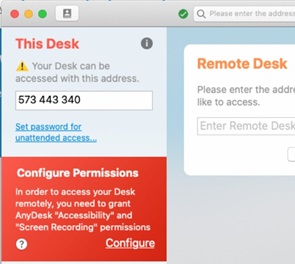
8. Click Configure to configure additional setting.
9. Select Accessibility and place a tick next to AnyDesk. You will need to do the same for Screen Recording.
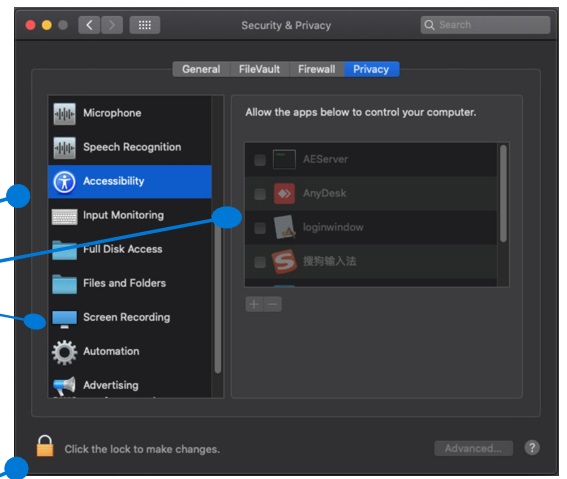
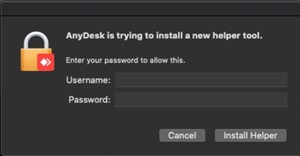
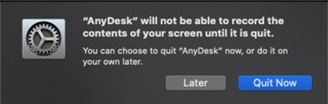
10. If the options on the right are un-tickable, you will need to hit the padlock on the bottom left then enter in your Mac password.
11. Once this has been done, you will need to hit Quite Now.
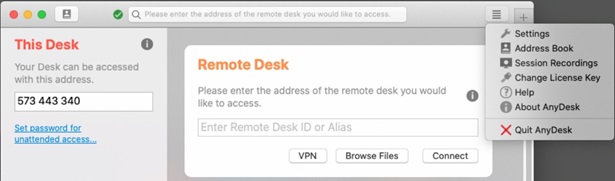
12. Double click the AnyDesk icon to open the application
13. Click the toaster button and select Settings.
14. Select Security.
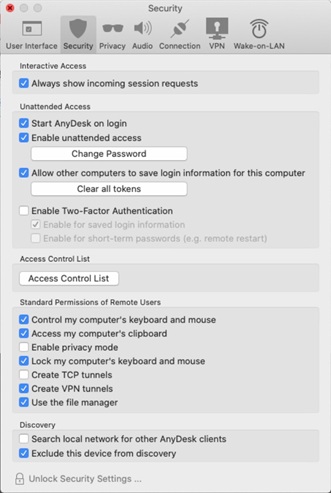
15. If the options are un-tickable, you will need to hit the padlock on the bottom left then enter in your Mac password.
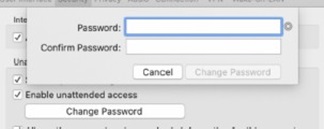
16. Tick the box Start AnyDesk on login.
17. Tick the box Enable unattended access then type in the password of Abc123Abc$
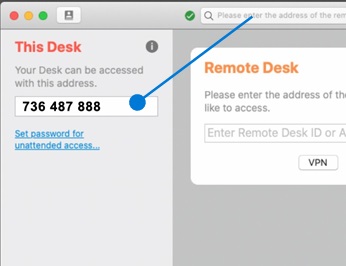
Your AnyDesk ID is here. This is the ID you give to the IT Support to allow them to remotely access your Mac.
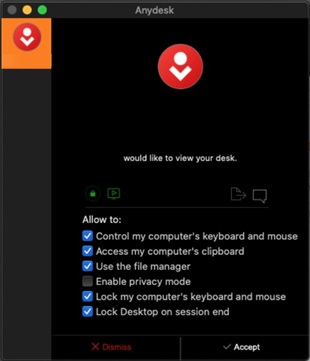
When IT Support Engineer attempts to connect to your PC, the permissions windows appears.
If no password has been set, you will be required to press Accept to allow the IT Support Engineer to remotely access your PC.